Dec 9, 2011

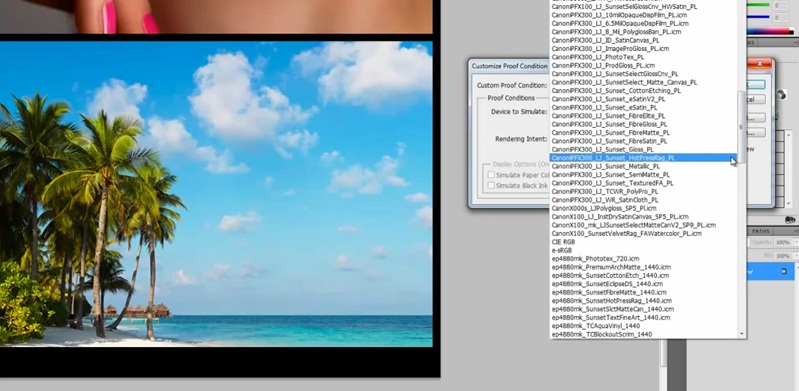
Color Modes


Take notes of the most important things and start searching photos related to the topic, you'll need them for the next practice.
While surfing the internet, search for creative and outstanding pamphlet or brochure designs.

Dec 8, 2011

PS Activity #11 & #12

Painting Pixels in RGB & CMYK mode.

Due date: Wednesday December 14th.

Pages 36, 37, 38 & 39 of your Photoshop Book.


Nov 30, 2011

Christmas Project

To start the activities of the Third Period, you are going to use all the tools we have learned so far about PS.
This project doesn't have specific steps or instructions, the purpose is that you use your imagination and apply the tools, effects, filters, styles, etc. you know.

The project consists in creating a christmas photomontage, where you are supposed to be a really really small person surrounded by giant and representative christmas things, like ornaments, cookies, christmas tree, lights, etc.

Take a look at the examples below, they were created by last year's students. You need to be part of the photomontage, so you will need a picture of yourself (high resolution) in different positions or angles. If you have a specific idea or christmas ornaments in your house that you'd like to use, take them a picture to use them in your project.

Use the image adjustments to make changes in the color or light.

Have Fun!!

PS file settings:  width 35 cm / height 25 cm / resolution 100 ppi.  *Christmas frame or border   *Your name at the lower right corner. (small)


These are examples of the perspective and angles you can use when taking your pictures, to make your photomontage more real.


Nov 14, 2011

Practice #11 - Shapes & Brushes

Vector art is a form of digital illustration and its use is increasing every day. Vector art can be seen in almost every part of print, online and televised media. Knowing how to use vector-based illustration is a prerequisite for almost every graphic design job due to its many applications in commercial media. Vector-based artwork is entirely dependent on computers because it is driven by complex mathematical equations. Though it is relatively new, many beautiful illustrations and compelling advertisements have been created with vector art.

Read more: Definition of Vector Art | eHow.com http://www.ehow.com/about_5043089_definition-vector-art.html#ixzz1diGJiiKQ

Instructions:

1. Download different shapes and brushes
2. Create a vector art wallpaper, you can use gradients, layer styles, filters, etc. Be creative!
3. Post it in your blog

PSD file settings:

1024 x 768 pixels
120 ppi
RGB Color 8 bit
bg transparent

Here are some examples of the vectorial compositions you can create. Use your imagination!


I found the previous images on the internet, I am not the author of them. =)

Practice #10 - Vector Mask Layers

    Part #1

    • Download File #4 and open it directly in Photoshop.

    • If the layer is blocked, rasterize it.

    • Add a new Mask Layer.

    • Start drawing shapes using the Custom Shape Tools. (it doesn’t have to be exactly as the example) 
    • You can download different shapes from http://freephotoshop.org and install them in your PS.

    • Add a new layer, and change the background (R:35 – G:105 – B:40) (Edit-Fill)

    • Crop the picture to remove part of the background (look at the example)

    • Save it as JPEG medium quality.

    • Post it in your blog.

    Part #2
    Make your own composition using Vector Mask Layers, be creative! Surprise me with your imagination!

    Nov 4, 2011

    Photoshop's Concept 3rd Part

    Instructions: Choose the correct word from the box, and answer correctly the following concepts. Highlight the answer with a different color, and make sure to add an example of each concept.

    Example:   These are approximations. What you see onscreen depends on the quality and settings of your monitor. Softproofs


    Hand Tool
    Tools Palette
    Magic Wand Tool
    Navigator Palette
    Clone Stamp Tool
    Burn Tool
    RGB
    Spot Healing Brush Tool
    CMYK
    Marquee Tools
    JPEG
    Adjustment Layers
    Layers
    Panning
    Document Window
    Zooming
    Tolerance
    Main Menu
    Polygonal Lasso Tool
    Dodge Tool
    Resolution
    Save for Web & Devices
    Layer Styles
    It compresses well
    TIFF, PDF
    Palettes
    History Palette
    Selection Tools
    Dodge & Burn
    72 ppi & 300 ppi
    1.    It’s located across the bottom of the application bar and organizes commands in individual menus.
    2.    It contains tools for creating and editing images, artwork, page elements, and soon. Related tools are groups together.

    3.    It displays the file you’re working on.
    4.    These help you monitor and modify your work.

    5.    This tool moves an image within its window. This is useful if you want to see a part of the image that is currently out of view.
    6.    In Ps this refers to the horizontal movement or rotation of an image.

    7.    In Ps this refers to change from a distant view to a more close-up view or vice versa.
    8.    This palette is another quick way to make large changes in zoom level.

    9.    You can use this layer to make changes in hue, levels, etc. while preserving the original image.
    10. You can use these tools to change the lightness and darkness of particular areas of an image.

    11. This tool allows more light to show through the negative, making the area lighter.
    12. This tool allows less light to show, making the area darker.

    13. This palette is used to undo steps and it keeps track of the last 20 commands you’ve applied to an image, allowing you to revert any one of these.
    14. This tool is used to remove minor blemishes from a photo. It is most effective with small distinctive features.

    15. This tool automatically samples pixels from the surrounding area and applies these to the selected area.
    16. Mention the file format to save photos for the web.

    17. Mention why the JPEG format is popular.
    18. You can use this command to preview JPEGs with different compression settings before you save them.

    19. Mention the recommended resolution to save images for on-screen display and images for print.
    20. Mention the color combination that computers use to display photos.

    21. Mention the name of the color combination used by the offset printing presses.  
    22. Mention two examples of formats with no compression, known them as lossless format.

    23. This is the level of detail in a bitmap image and is measured in pixels per inch (ppi).
    24. The better you are at using these tools, the more flexibility you have with changing parts of images.

    25. This tool selects parts of an image that have similar colors.
    26. This tool selects a geometrically shaped area, such as a rectangle or circle.

    27. This tool defines a selection area by hand.
    28. This blurs a selection’s edges by adding a transition boundary between the selection and its surrounding pixels.

    29. These are like sheets of stacked paper.
    30. You can apply this to add special effects such as drop shadow or a glow. 

    Nov 3, 2011

    Photoshop's Concepts 2nd part

    Photoshop's most commonly used shortcuts & quick keys

    Instructions: Search in Photoshop the shortcuts or quick keys of the following commands & tools and post them in your blog.


    1)         New file
    2)         Open file
    3)         Close file
    4)         Undo
    5)         Copy
    6)         Paste
    7)         Fill
    8)         Free transform
    9)         Hue and saturation
    10)       Image size
    11)       Canvas size
    12)       New layer
    13)       Liquify Filter
    14)       Layers
    15)       Marquee tools
    16)       Lasso tools
    17)       Magic wand tool
    18)       Crop tool
    19)       Healing brush / red eye tools
    20)       Brush /pencil  tools
    21)       Clone & pattern stamp tools
    22)       Eraser tool
    23)       Gradient / paint bucket tools
    24)       Pen tool
    25)       Type tool
    26)       Path & direct selection tools
    27)       Shapes tools
    28)       Hand tool
    29)       Zoom tool