Nov 14, 2011

Practice #10 - Vector Mask Layers

    Part #1

    • Download File #4 and open it directly in Photoshop.

    • If the layer is blocked, rasterize it.

    • Add a new Mask Layer.

    • Start drawing shapes using the Custom Shape Tools. (it doesn’t have to be exactly as the example) 
    • You can download different shapes from http://freephotoshop.org and install them in your PS.

    • Add a new layer, and change the background (R:35 – G:105 – B:40) (Edit-Fill)

    • Crop the picture to remove part of the background (look at the example)

    • Save it as JPEG medium quality.

    • Post it in your blog.

    Part #2
    Make your own composition using Vector Mask Layers, be creative! Surprise me with your imagination!

    Nov 4, 2011

    Photoshop's Concept 3rd Part

    Instructions: Choose the correct word from the box, and answer correctly the following concepts. Highlight the answer with a different color, and make sure to add an example of each concept.

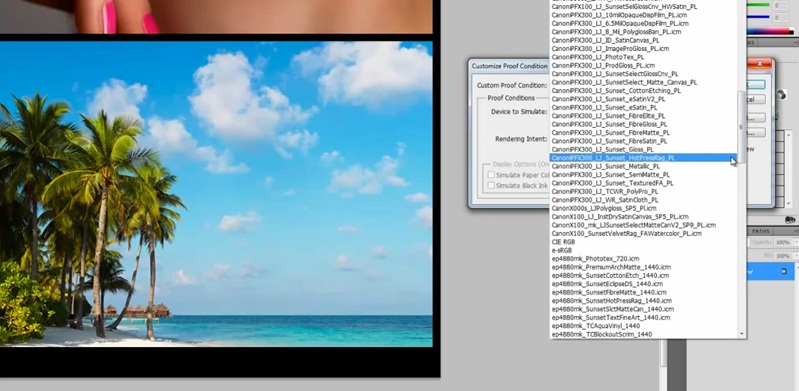
    Example:   These are approximations. What you see onscreen depends on the quality and settings of your monitor. Softproofs


    Hand Tool
    Tools Palette
    Magic Wand Tool
    Navigator Palette
    Clone Stamp Tool
    Burn Tool
    RGB
    Spot Healing Brush Tool
    CMYK
    Marquee Tools
    JPEG
    Adjustment Layers
    Layers
    Panning
    Document Window
    Zooming
    Tolerance
    Main Menu
    Polygonal Lasso Tool
    Dodge Tool
    Resolution
    Save for Web & Devices
    Layer Styles
    It compresses well
    TIFF, PDF
    Palettes
    History Palette
    Selection Tools
    Dodge & Burn
    72 ppi & 300 ppi
    1.    It’s located across the bottom of the application bar and organizes commands in individual menus.
    2.    It contains tools for creating and editing images, artwork, page elements, and soon. Related tools are groups together.

    3.    It displays the file you’re working on.
    4.    These help you monitor and modify your work.

    5.    This tool moves an image within its window. This is useful if you want to see a part of the image that is currently out of view.
    6.    In Ps this refers to the horizontal movement or rotation of an image.

    7.    In Ps this refers to change from a distant view to a more close-up view or vice versa.
    8.    This palette is another quick way to make large changes in zoom level.

    9.    You can use this layer to make changes in hue, levels, etc. while preserving the original image.
    10. You can use these tools to change the lightness and darkness of particular areas of an image.

    11. This tool allows more light to show through the negative, making the area lighter.
    12. This tool allows less light to show, making the area darker.

    13. This palette is used to undo steps and it keeps track of the last 20 commands you’ve applied to an image, allowing you to revert any one of these.
    14. This tool is used to remove minor blemishes from a photo. It is most effective with small distinctive features.

    15. This tool automatically samples pixels from the surrounding area and applies these to the selected area.
    16. Mention the file format to save photos for the web.

    17. Mention why the JPEG format is popular.
    18. You can use this command to preview JPEGs with different compression settings before you save them.

    19. Mention the recommended resolution to save images for on-screen display and images for print.
    20. Mention the color combination that computers use to display photos.

    21. Mention the name of the color combination used by the offset printing presses.  
    22. Mention two examples of formats with no compression, known them as lossless format.

    23. This is the level of detail in a bitmap image and is measured in pixels per inch (ppi).
    24. The better you are at using these tools, the more flexibility you have with changing parts of images.

    25. This tool selects parts of an image that have similar colors.
    26. This tool selects a geometrically shaped area, such as a rectangle or circle.

    27. This tool defines a selection area by hand.
    28. This blurs a selection’s edges by adding a transition boundary between the selection and its surrounding pixels.

    29. These are like sheets of stacked paper.
    30. You can apply this to add special effects such as drop shadow or a glow. 

    Nov 3, 2011

    Photoshop's Concepts 2nd part

    Photoshop's most commonly used shortcuts & quick keys

    Instructions: Search in Photoshop the shortcuts or quick keys of the following commands & tools and post them in your blog.


    1)         New file
    2)         Open file
    3)         Close file
    4)         Undo
    5)         Copy
    6)         Paste
    7)         Fill
    8)         Free transform
    9)         Hue and saturation
    10)       Image size
    11)       Canvas size
    12)       New layer
    13)       Liquify Filter
    14)       Layers
    15)       Marquee tools
    16)       Lasso tools
    17)       Magic wand tool
    18)       Crop tool
    19)       Healing brush / red eye tools
    20)       Brush /pencil  tools
    21)       Clone & pattern stamp tools
    22)       Eraser tool
    23)       Gradient / paint bucket tools
    24)       Pen tool
    25)       Type tool
    26)       Path & direct selection tools
    27)       Shapes tools
    28)       Hand tool
    29)       Zoom tool 


    Oct 28, 2011

    Photoshop's Concepts 1st Part

    Using print screen identify the following parts of photoshop's interface:

    1. The tools palette
    2. Layers palette
    3. History palette
    4. Navigator palette
    5. Options bar of the move tool
    6. Main menu
    7. Adjustments palette

    Using print screens answer the following:

    1. The process for creating a new document.
    2. The process for placing an image.
    3. The process for opening a document.
    4. The process for saving an image as JPEG, medium quality.
    5. The process to change an image's size

    Instructions: Take the print screens, paste them in photoshop (crop them if necessary), save them as JPEG formats, post them in your blog with the correct names and full explanation of the process.

    Oct 26, 2011

    Practice #9

    Practice 9.1 – Marquee Tools & Photo Filters

    • Download File #1 and open it directly in Photoshop.
    • If the layer is blocked, rasterize it.
    • Using the rectangular marquee tool, select the main building of the picture.
    • Apply a Deep Emerald Photo Filter with density at 90%. [Image - Adjustments - Photo Filter]
    • Save it as JPEG medium quality.
    • Post it in your blog.
    Practice 9.2 – Polygonal Lasso Tool & Filters

    • Download File #2 and open it directly in Photoshop.
    • If the layer is blocked, rasterize it.
    • Crop the image using the crop tool, as shown in the example.
    • Using the Polygonal Lasso Tool (feather: 2px), select the background, leaving only the first rock without selection.
    • Apply a Gaussian Blur Filter, with radius in 2.0 pixels. [Filter - Blur - Gaussian Blur]
    • Save it as JPEG medium quality.
    • Post it in your blog.
    Practice 9.3 – Polygonal Lasso Tool & Paint bucket tool

    • Download File #3 and open it directly in Photoshop.
    • If the layer is blocked, rasterize it.
    • Using the Polygonal Lasso Tool (feather: 2px), select the buildings and copy them. [ctrl + C]
    • Create a New Layer and paste the selection. [Ctrl + V]
    • Delete the original layer.
    • Create a new layer and using the paint bucket tool, add color to the background. (R:222 – G:235 – B:6)
    • Arrange the layers if it's necessary, to put the buildings infront of the background.
    • Save it as JPEG medium quality.
    • Post it in your blog.

    Oct 25, 2011

    Practice #8 - Composite Image


    • Download File #5, File #6, File #7, File #8 and File #9.
    • Open file #5 directly in Photoshop.
    • If the layer is blocked, convert it to smart object and then rasterize the layer.
    • Create a new layer. Convert it to a background layer. {Layer - New - Layer from background} (it will turn to white)
    •  Select the wall layer. Change its opacity to 50% in the layers palette)
    •  Open file #6 directly in Photoshop.
    • Paste it to the original file. (use the move tool and holding down Alt, drag the selection to the composition file. Rename the layer. (ocean)
    •  For the big picture use these layer styles {layers palette}
      • Drop shadow: opacity 70% - distance 15px – spread 13% - size 13px 
      • Stroke: size 4 – color R:74-G:56-B:25)
    • For the smaller pictures use these layer styles. 
      • Drop shadow: opacity 70% - distance 7px – spread 26% - size 13px 
      • Stroke: size 3 – color, free to choose
    • For the medium picture use these special effects. 
      • Outer glow: opacity 90% - spread 20% - size 30px – color, free to choose)
    • Save it as JPEG medium quality and post it in your blog.

    Oct 18, 2011

    Practice # 7 - Photoshop Filters

    Photoshop Filters are used to clean up or retocuh your images. These filters apply special arte effects that give your image the appearance of a sketch or pastel painting. You can see the result of the filters in your image before you apply them.

    To apply a filter go to the Filters menu located in the Main Menu.


    Instructions: Download 20 different appropriate pictures, and apply them the following filters. (one filter per picture)

    1. 5 pictures with Artistic filters (free to choose)
    2. 2 pictures with Brush Strokes filters (free to choose)
    3. 2 pictures with Pixelate filters (free to choose)
    4. 2 pictures with Render filters (lens flare & lighting effects)
    5. 5 pictures with Skecth filters (free to choose)
    6. 2 pictures with Stylize filters (free to choose)
    7. 2 pictures with Texture filters (free to choose)